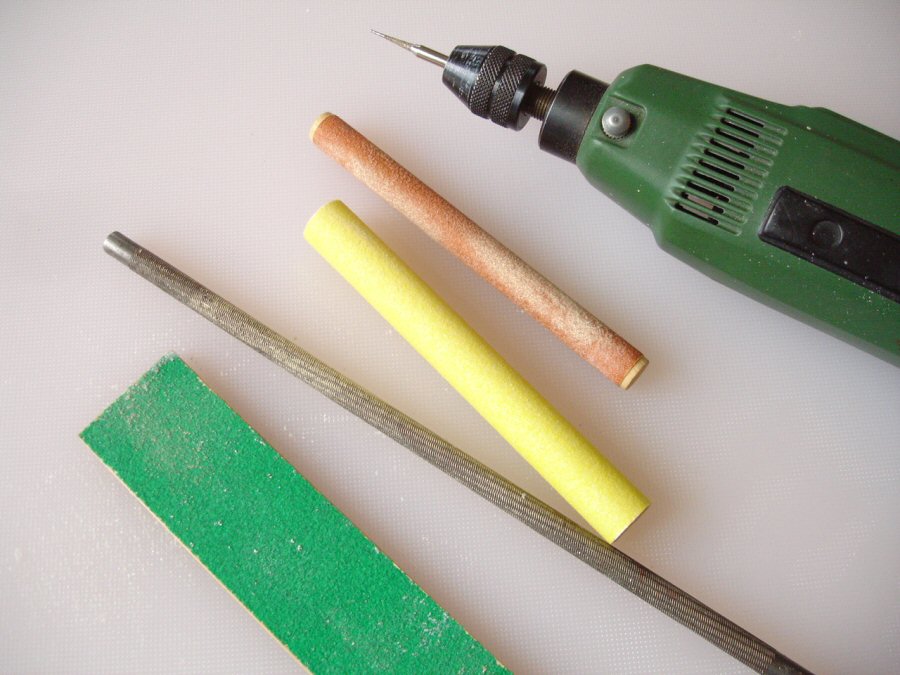
For a mixed-media sculptural project I’m working on at the moment I’m trying various ways of ‘casting’ leaf forms. I’ve already tried painting resin into the mould forms and the results were nicely thin and delicate looking but difficult to manipulate into the variations I wanted. I’ve done some press-casting with Sculpey in the past and found it much more versatile. The results are durable enough if properly baked, dependent on how they’re integrated with the rest and .. as long as the finished piece is not thrown around!
I modelled the prototype forms below as flat reliefs on a Pvc base. I didn’t want to mimic the exact vein structure of leaves too closely, just suggest a ‘cabbage-y’ feel in this case. I made use of a custom modelling tool I’d made some time ago for simulating a tree bark pattern (shown in one of the later photos below). I also used a piece of open-celled or reticulated foam to give the Sculpey an ‘orange-peel’ surface.


Above, I used scrap cardboard for containment walls, stuck to the Pvc baseboard with UHU (forms a strong enough seal, but removable afterwards) and Vaselined to prevent adhesion of the silicone. Neither Pvc nor Sculpey needs any barrier, although if for any reason the prototypes need to be preserved these should either be baked or greased with Vaseline because silicone rubber tends to extract the plasticizer from unbaked Sculpey making it crumbly. I used my favourite, medium-hardness (Shore A 20) silicone, Lukasil 429 from www.specialplasters.co.uk which has a red pigmented catalyst to assist with mixing. Although I’ve found that there’s rarely a problem with air bubbles when using a slow-curing silicone (24hrs) without thickener, I usually dribble some first to cover the forms and let this settle for a while before pouring in the rest.

I’ve found that silicone moulds don’t need to be too resilient for press-casting in Super Sculpey. If the Sculpey is properly conditioned (softened) beforehand little pressure is needed and the more the mould can flex to assist removing the press-casting the better. The best way is to roll a portion of Sculpey fairly thin, just large enough to cover the area being filled and press this firmly in, working into all details.

Then the Sculpey layer should be roughly trimmed, just to remove most of the excess, using a scalpel held at a fairly shallow angle to avoid cutting into the silicone itself, below.

The clay can then be pressed further, working it more tightly in and thinning it (by more pressing and trimming) if necessary. The edge can then be cleaned up by gently rocking/smoothing with a finger all round.

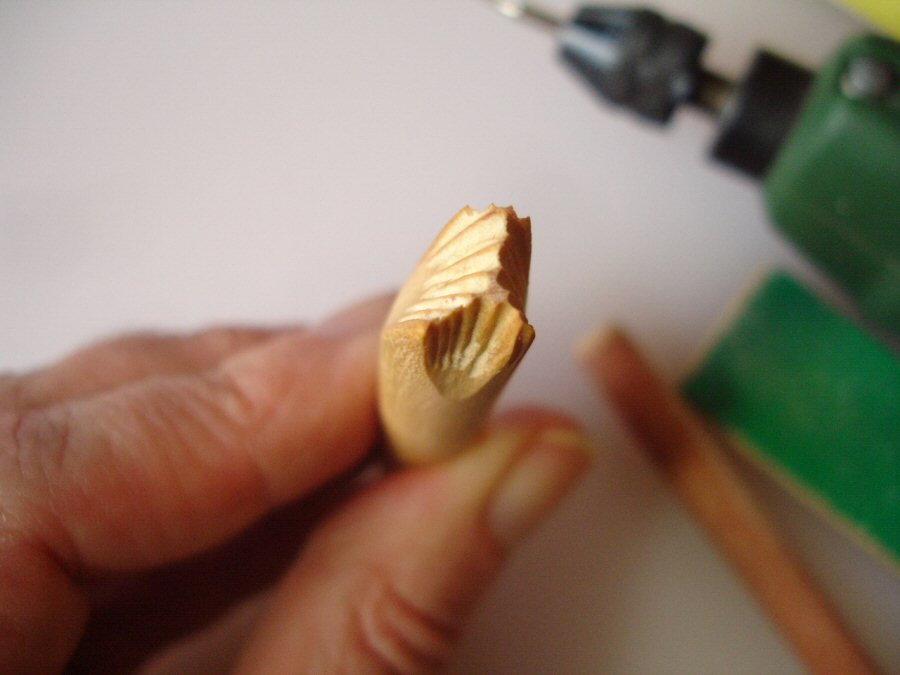
Below, I’ve used a self-made modelling tool to quickly add some surface structure to this side of the leaf. I made the tool originally to impress a bark-like pattern for tree models, by first modelling Sculpey over an old scalpel blade and then baking it hard. I left the base of the blade free so that it could be inserted into the type of ‘clutch’ handle supplied with some types of craft blades. The baked Sculpey can be pressed into fresh Sculpey quite forcibly without sticking.

I also use a small piece of reticulated foam again to give a uniformly pitted texture.


Using this method the pressed shapes can be modified by gently curling or bending them before baking. No single casting will look exactly like another.
The advice regarding baking from the US Polyform company (included on the packet) suggests giving Super Sculpey 15 minutes for every quarter-inch of thickness in an oven heated to 130 Centigrade. This is true if one’s aim is to preserve the light pink colour as far as possible but it certainly doesn’t harden the Sculpey as much as it can be hardened. I gave these leaf forms (which were on average only 2mm thick) 20 minutes at 130 C resulting in the nut-brown colour. This is not ‘burnt Sculpey’ .. this is Sculpey properly strengthened .. and there is no extra shrinkage or loss of detail suffered in doing this.

My past experiments in press-casting include the similar ‘leaf’ forms below, featured in my book. For these I used a Gelflex mould but they were made in the same way. The following two photos are from Astrid Baerndal.


At the time these ‘sprigs’ were inspired by the putti forms which clustered and buzzed around Baroque representations of the Ascension, or particularly the flying figures I’d seen in the large collection of nativity scenes (krippen) in the Bavarian National Museum in Munich.
I also looked at this method of making lightweight puppet heads. Here I used a stronger Sculpey version (actually a blend of grey ‘Firm’ Sculpey, some original white and some Super Sculpey) and filled deeper details in the mould separately first to ensure they were properly dealt with.

Portions of Sculpey were then pressed in and smoothed together. In the finished casts there was some very slight suggestion of fault lines where the Sculpey had not fused together completely on the other side.


When filled and trimmed, above, the Sculpey can be baked while still in the mould (essential because it would distort too much if removed from the mould at this stage) either by using a heat gun for a number of minutes or by putting the whole setup in the oven. Most silicones (even if not specified as heat-resistant) will withstand up to about 200 C without any effects. Oven heating is more effective because, if given long enough, the Sculpey furthest from the surface will also be baked. The heat gun method ensures that the uppermost Sculpey becomes firm enough for the cast to be taken out of the mould without distortion but the other side then needs to be given the same treatment. Below are the two baked halves and another version assembled with the seam line filled. Superglue is very effective in bonding Sculpey together, but it is not gap-filling. This can be done with fresh Sculpey which in turn needs heating.