This was meant to be just another short ‘hidden treasures of the pound-shop’ piece recommending the value of cheap liquid polishes such as these below as alternatives to more expensive wood stains. I’ve used similar bottled shoe polishes many times in the past, particularly for staining model floorboards .. with very good results!
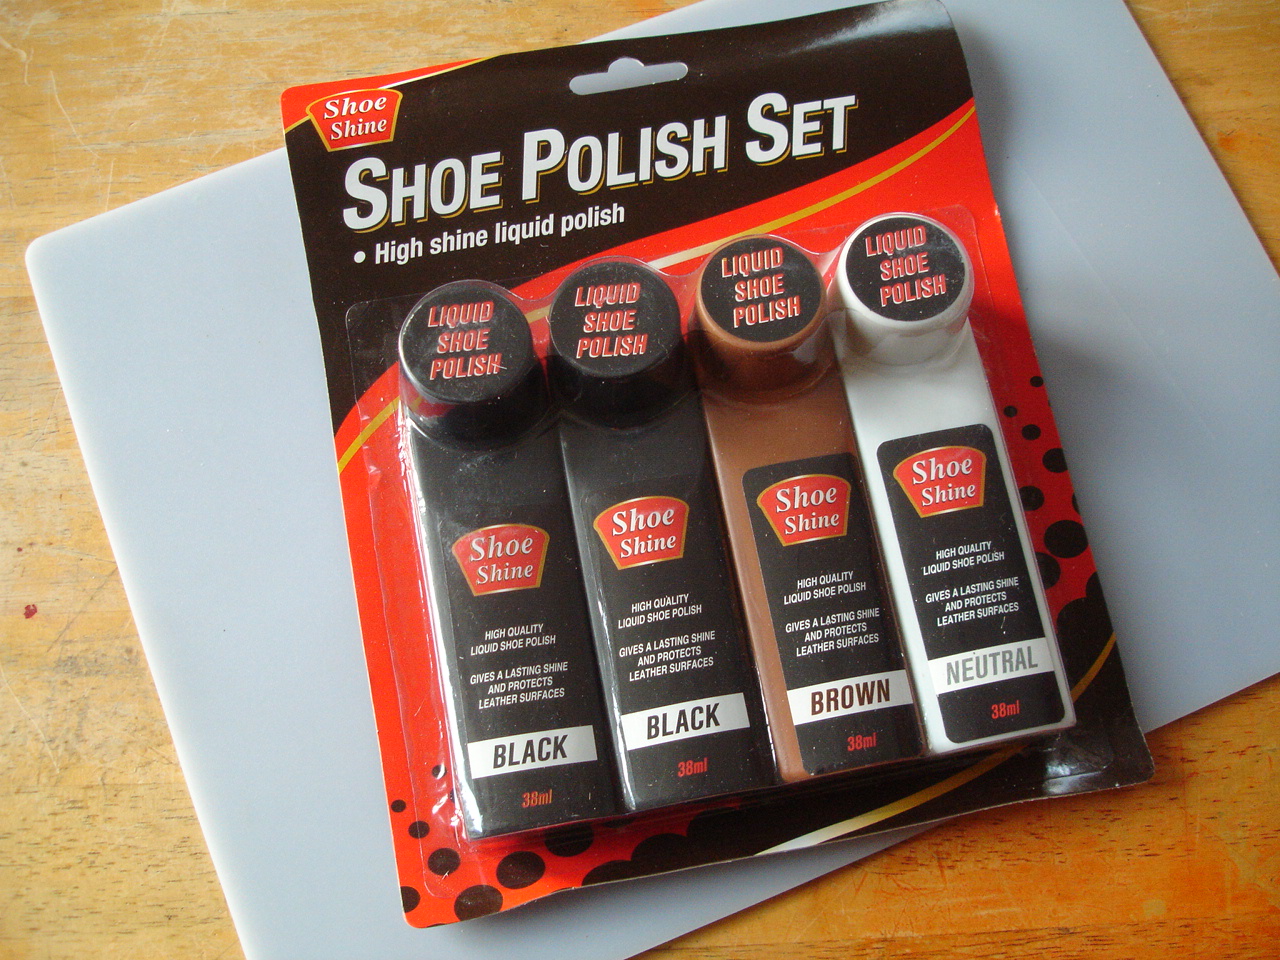
But these ones currently in 99p Store are, as you can see below, unusually weak in terms of colour. I’ve made these tests on pieces of 0.8mm sheet obeche wood, which normally accepts stain very well. Each of the sample pieces featured in this post was made with a fixed procedure! Firstly I ruled three faint pencil lines and applied the first coat up to the top pencil line, leaving a little of the wood bare above. I then waited a minimum of 2 hours before applying the second coat up to the line below and then another 2 hours before applying the third. I chose 2 hours in between because this was the time it took for the pieces of wood to return to almost complete flatness after warping .. so I figured these were sufficiently dry for the next coat. As you may know, warping doesn’t occur with oil or spirit-based media, and with spirits the ‘drying’ is a lot quicker .. but I gave these the same intervals anyway.

The polite word for these is ‘subtle’ .. the ‘Neutral’ had so little visible effect on the wood, even after three coats, that I didn’t even notice that I’d photographed the piece upside down! The brown and black did impart some even colouring as you can see, but even after three coats and rubbing afterwards there was only slightly more ‘sheen’ than the obeche wood has on its own.
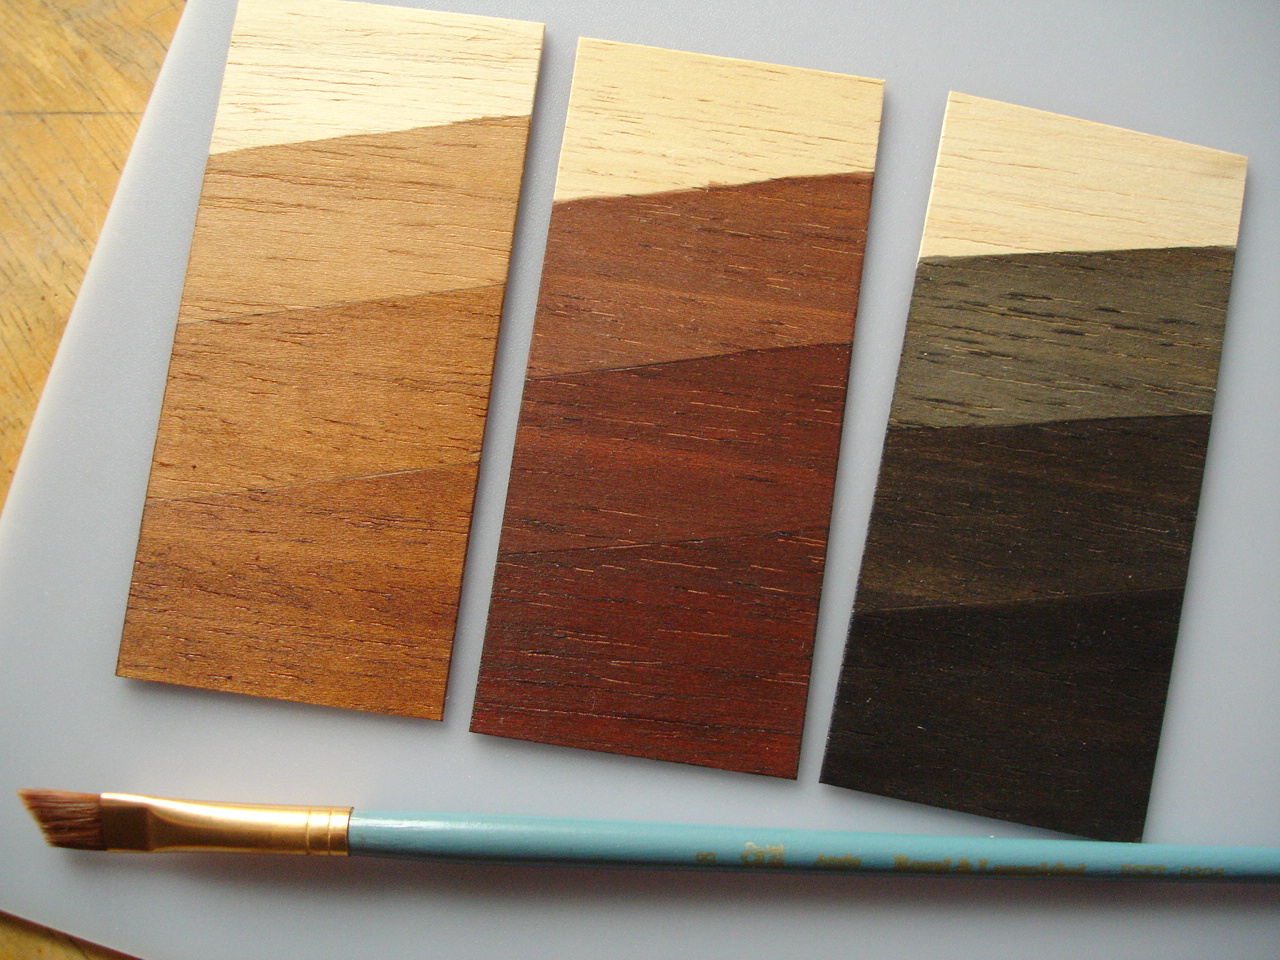
But there are much better ones! The lighter brown sample on the left below is brown liquid polish from Tiger, the one in the middle is brown Cherry Blossom Readiwax brand found in Poundland and the last is Kiwi Wax Rich Colour Shine also from Poundland but a while ago. I’ve overdone the photo exposure a little .. the colours are richer and deeper in reality. All of these gave a visible, regular sheen to the wood surface on the second coat, and more pronounced on the third.
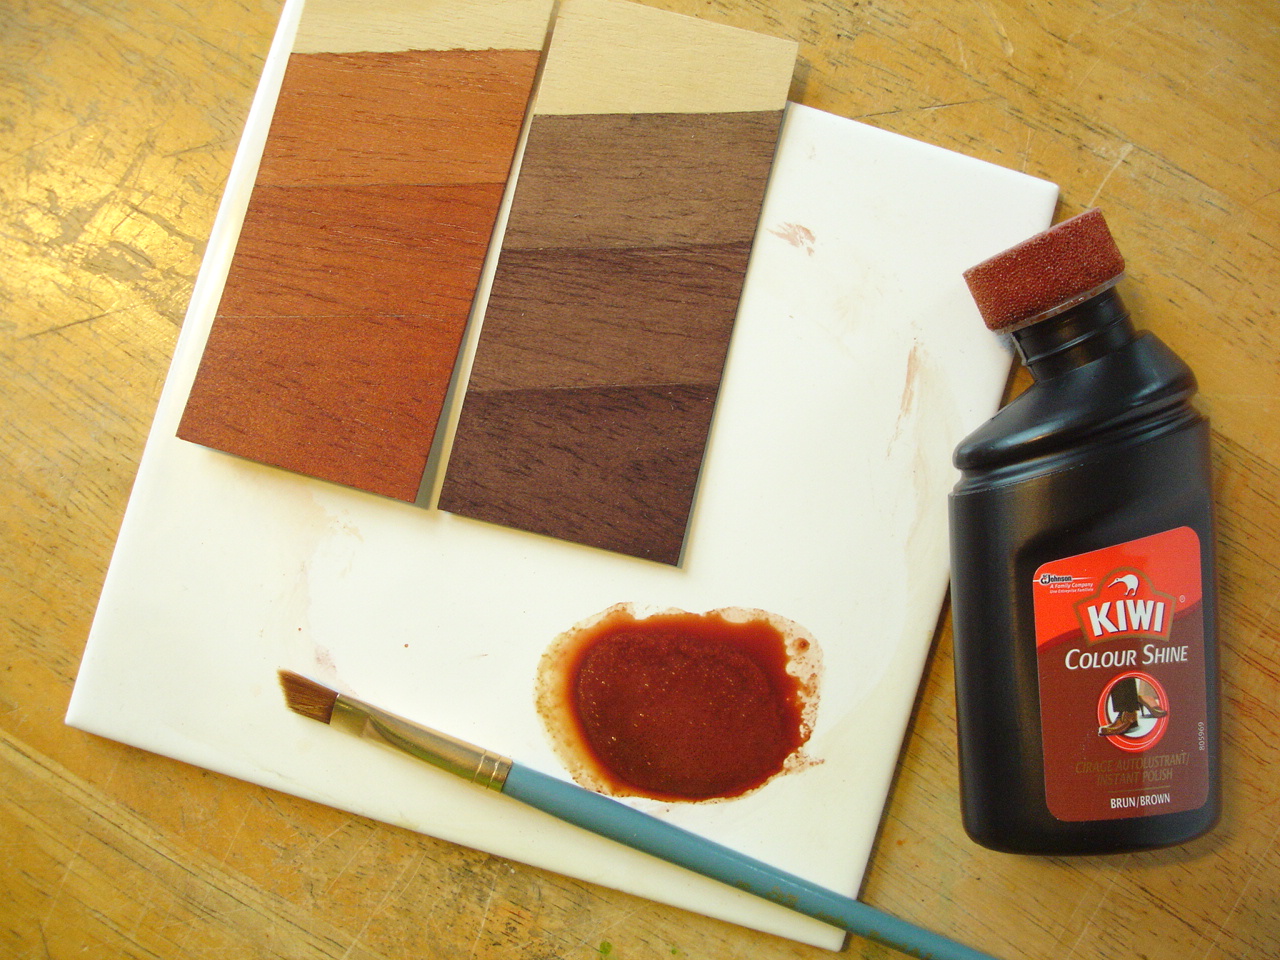
Here are just two more, but also showing how best to apply the liquid polish. The sample to the left is the brown Kiwi Colour Shine shown in the photo, also found in Poundland, and next to it is one made with Clarks brown polishing cream, which is thin enough to brush on easily and infiltrate the fibres. The Kiwi polish gave a good sheen after three coats but the polishing cream remained matt. If you intend to cover large areas you could use the sponge applicator attached, but for these small ones it was easier to press out a small amount of polish on a tile and use a rigid synthetic brush.
All of the polish types I’ve featured so far are ‘water-carried’ including the polishing cream .. suspensions of pigment and wax in water. So one has to deal with the fact that the water will make thin wood warp! It can look rather alarming .. especially if as here the wood grain is perpendicular to the length of the strip. But as the piece slowly dries it returns to almost complete flatness again. As I’ve said, if using 0.8mm obeche wood this will take at least 2 hours .. but it will differ according to wood thickness and type.
Although it might be an annoying way to work, I would recommend if you want to treat wood with anything water-based (including water-based commercial wood stains) that the pieces are treated like this i.e. stained and left to dry before sticking down. It may be logical to assume, when making a floorboard floor for example, that sticking all the boards securely on a base first will prevent the whole thing from warping when painted. It doesn’t .. in fact it can make it worse! I think what happens is that if something absorbent like cardboard is used as the base, when the wood on top is painted some of the moisture reaches the cardboard so it will also warp .. this is clear. But as both dry out the moisture which has reached the cardboard is trapped so that whereas the wood layer will dry the cardboard will take longer. The drying wood will therefore ‘set’ in this position. When this happens it is impossible to get the ‘composite’ flat again.
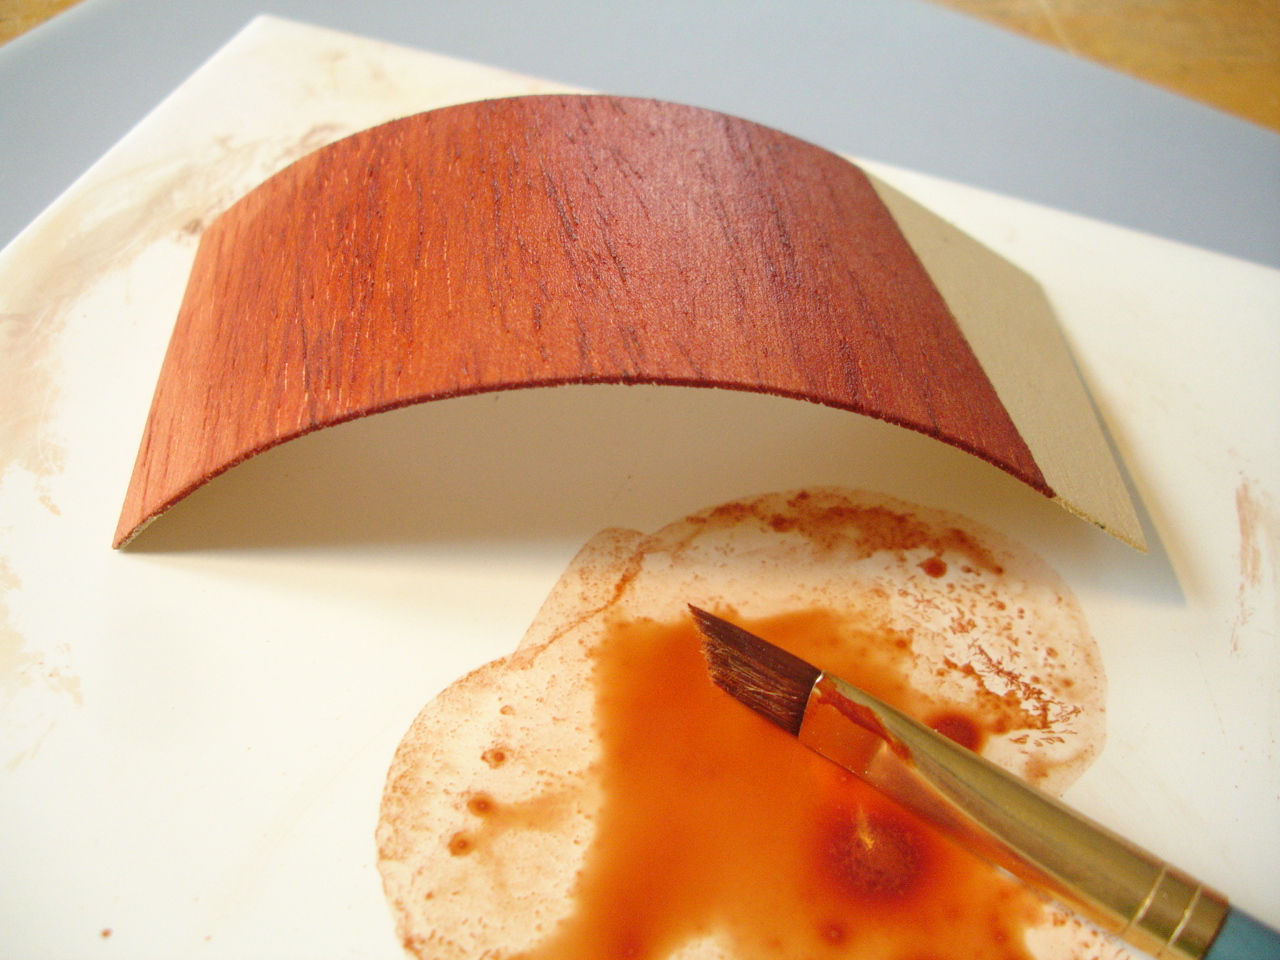
It can be a bit dangerous if one gets hooked on the satisfaction of making illustrative samples .. one looks around for more things to test! Samples don’t have to have any other meaning, and one isn’t going to be judged on their aesthetic value. Breaking free of both the conceptual and the aesthetic actually does have positive advantages sometimes.. it opens the door wide for serendipity! Otherwise I wouldn’t have thought of trying two other media I just happened to have around at the time .. GlasArt transparent glass paints from Marabu and Letraset ProMarkers. As it happened both worked far better than I expected, with the big advantage that neither of them cause warping because they’re spirit-based. The other significant advantage is the cost of them. If one only wants to stain a relatively small area it’s quite an expense to buy commercial spirit-based wood stain, or a combination stain/varnish. The smallest tins or bottles available are generally somewhere over £6.00. The smaller 15ml jars of Marabu GlasArt can be found for between £2.00 – £2.60 and Letraset ProMarkers are on average £2.00 each.
The GlasArt paints work like a dream on wood! They can either be applied straight from the jar, as I’ve done with the sample to the far left above, or thinned with white spirit as I have with the other two. I used Bartoline Low Odour White Spirit and mixed roughly equal amounts of spirit and paint together on a tile. As before, the best brush to use is a flat one, with soft but rigid synthetic hairs. The first coat penetrates readily but dries relatively matt; the second has more noticeable sheen, and the third gives a regular satin finish. Whether thinned or used straight, the GlasArt paint penetrated the wood fibres better than I expected. For an even stronger shine I would recommend applying some neutral Kiwi solid shoe polish such as the one shown later. This has to be thinly brushed or rubbed in, left for about half an hour, then buffed with either a clean shoe brush or soft rag. I would recommend using a polish like this every time for scale model work, rather than using any kind of gloss varnish. Varnish is too ‘full on’ for miniature work, and it will emphasis every little imperfection. Often the sheen that the wood already receives is enough to suggest a polished look, but if one has to have more, polish can be far better controlled. It means for example that a floorboard floor stays more matt where it is difficult to buff i.e. along wall edges or in corners, which makes more realistic sense!

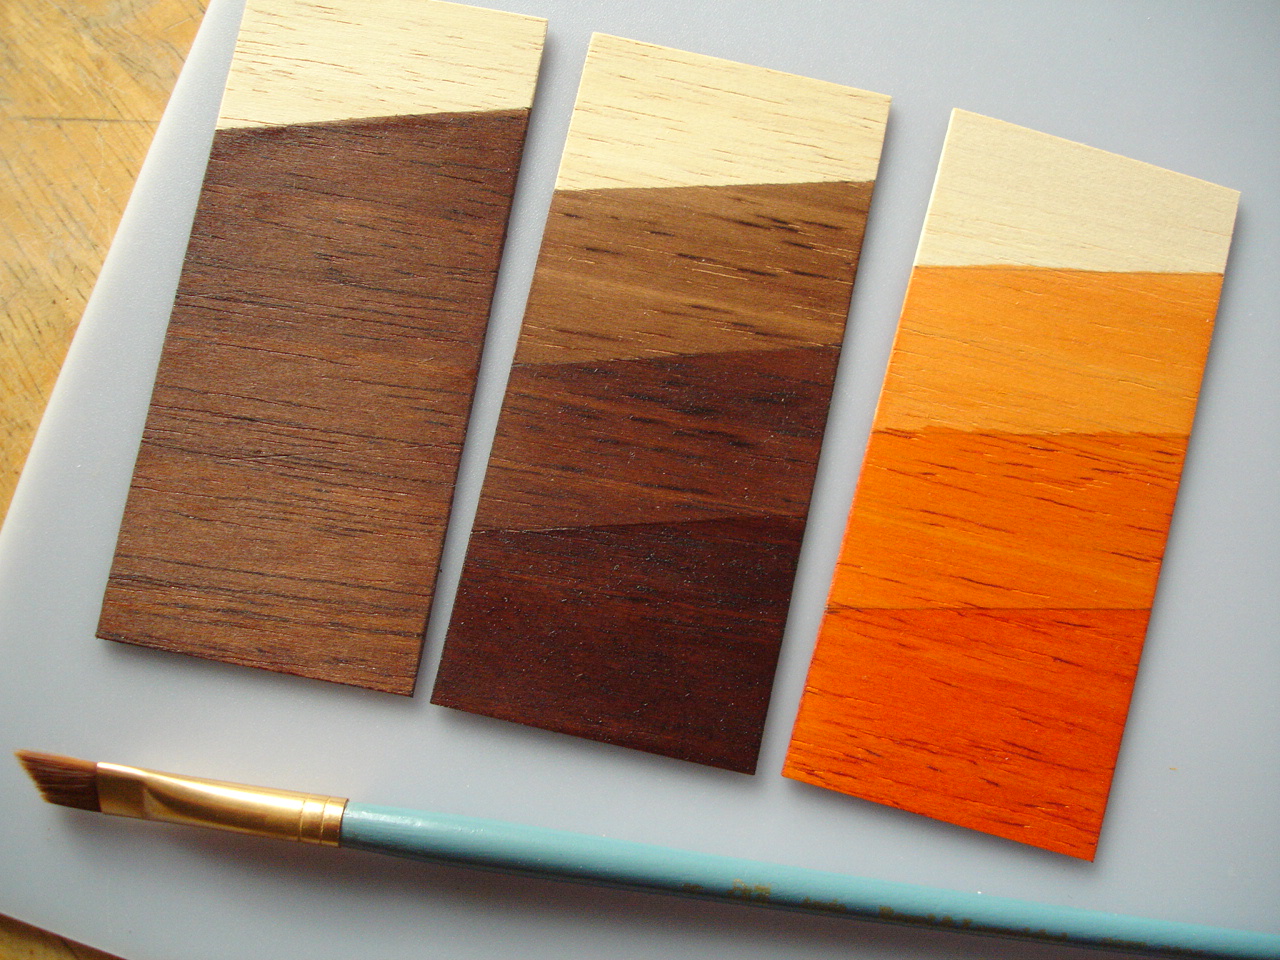
Letraset’s ProMarkers come in a wide range of colours .. 148 in total. Below I’ve used a few I had which were suitable as wood colours, but there are many more. In addition they can be easily ‘mixed’ .. that is, overlaid .. so the colour range is infinite! The ink is alcohol-based and it penetrates the wood fibres very well. But it is also ‘self-sealing’ .. there must be a fixative in addition to the alcohol, though there is no info on what this is .. so transparent layers can be built up and colours deepened. Here I’ve used, from left to right; ‘Ice Grey 1’, ‘Sandstone’, ‘Spice’, ‘Walnut’ and ‘Warm Grey 5’. Although the ink is thin, a build-up of layers will produce a sheen, though not as much as the GlasArt paint or the better polishes. Another advantage for small-scale work is that the ProMarkers come with both a broad and a fine felt nib. Because it penetrates so well I expected it to be difficult to draw a hard edge on the wood, at least for the first coat, but as you can see from the top edges it didn’t ‘bleed’ as much as regular wood stains.

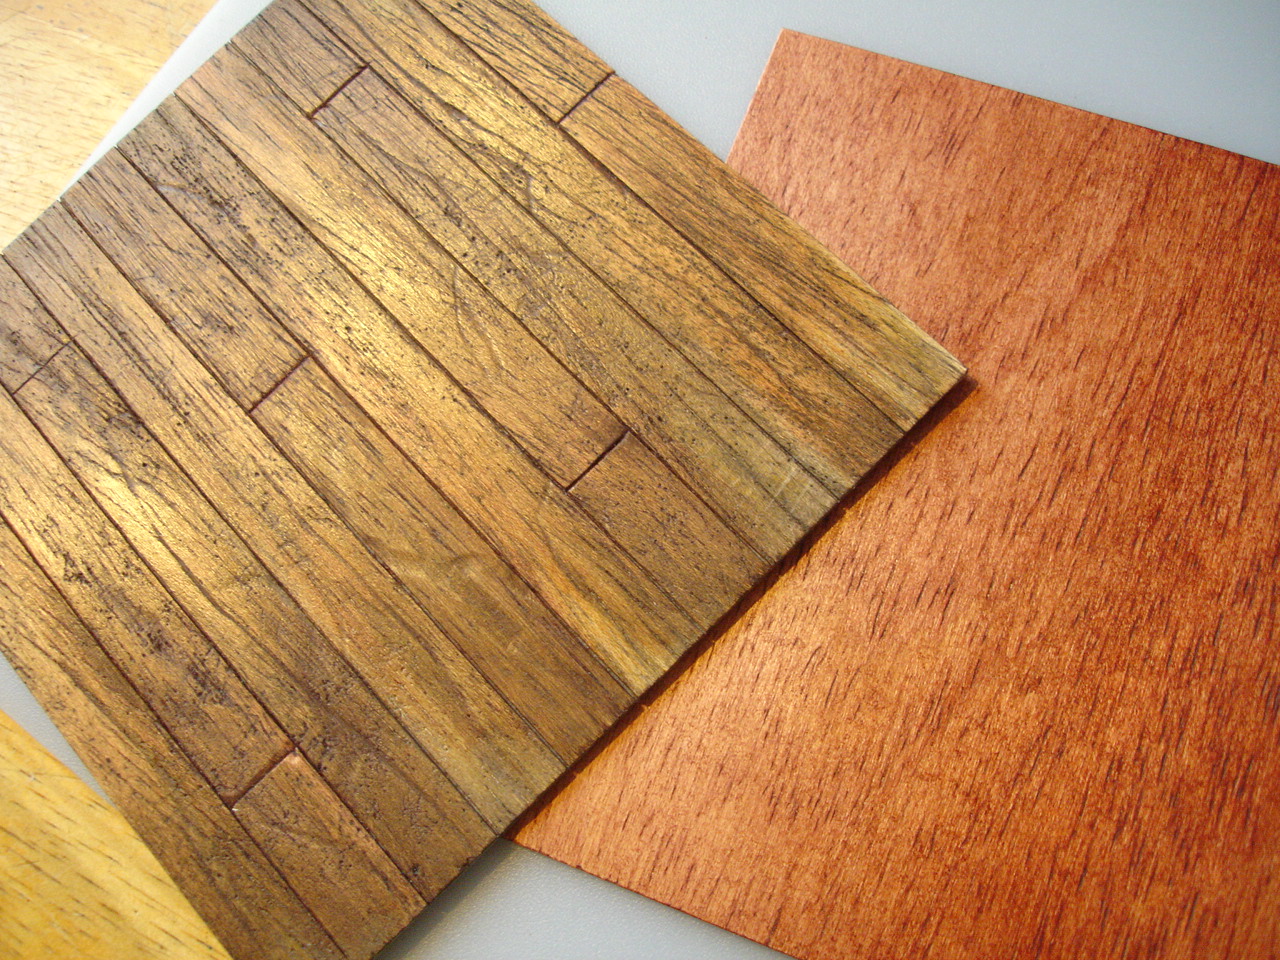
This could make it easier to ‘fake’ a more complicated parquet flooring pattern, just by using different tones or hues of marker. It can be fairly tightly controlled even on balsa wood, which is one of the most absorbent woods. Below I’ve compared the same colours on balsa, to the right, with obeche to the left. Balsa generally stains more evenly than obeche, especially when layers are built up, but obeche will give a richer and deeper colour.

One last option .. let’s say, if you don’t want to get anything special at all for staining wood .. is just to use whatever transparent paints you’ve got such as watercolours. If you do use watercolours I would recommend painting before gluing down, as before. Don’t use either acrylics or gouache because these will not be sufficiently transparent .. they will obscure the natural grain of the wood, and the effect will be rather lifeless and artificial.
In place of watercolour though, I prefer to use regular colour pencils or pastels ‘dissolved’ using white spirit. This avoids the problem of warping, but I’ve also found that the colours are richer using spirit, and it means that so many more things can be turned into paints or stains. These small floor samples were made by firstly shading some pencil colour on the bare wood, then dissolving it with low odour white spirit and a synthetic brush. The dry pencil pigment dissolves readily and can be worked over and into the wood, but the ‘paint’ produced remains workable for much longer than watercolour or acrylic. It is basically a straight ‘watercolour’ technique .. just not using water .. and with the added control of adding the colour, not solely with a brush but also with the pencil-point .. a combination of painting and drawing. I’ve preferred to keep these samples subtle to show the nuances achievable, but one can go much richer and darker with the colours.

I’ve used Karismacolor pencils here because these were my favourite and I still have them, but sadly Berol discontinued them long ago. Others who use colour pencils in their work say that Prismacolor or Polychromos are comparable .. rich colours, soft but not chalky-fragile! These are all oil-based pencils, which definitely work better for this technique, though I have found that any kind of colour pencil will work to some extent.

For the sample floorboard piece above, and below, I wanted to simulate the distinctive markings of old oak, but using obeche. I cut the planks and sanded the edges a little first, then ‘distressed’ them variously using a heavy-duty wire brush .. either pressing and pulling for deep scratches or just pressing and rocking for pockmarks. I then glued them in place, inscribing the floorboard ends with a sharp tool afterwards. I used the pencils to shade or cross-hatch on the wood in various browns, but defining some differences between the floorboards. When dissolving the shading with white spirit I made sure that most of the colour collected in the scratches .. conventional wood stain would most likely colour too uniformly, not differentiating enough. Much more variation could be achieved than I’ve shown here, by shading parts with pencil again and fixing with very minimal spirit.
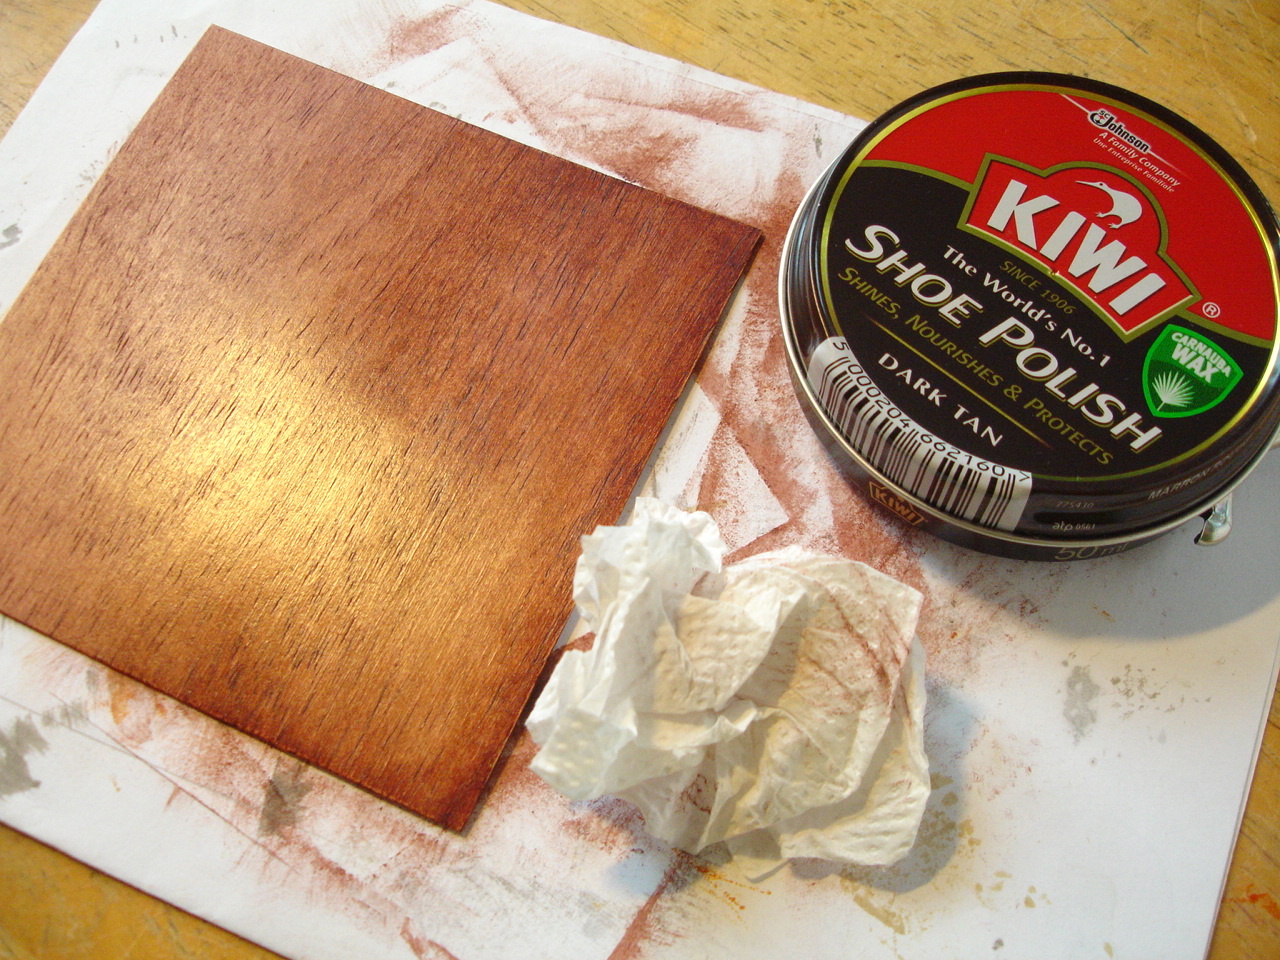
But the pencil/white spirit technique doesn’t create much shine, so after I’d given the sample a few hours to dry I applied a thin coat of the solid shoe polish shown .. a ‘Dark Tan’ to give it a bit more warmth. One needs to wait for it to ‘set’ before polishing .. between 30-50mins. As one final test I tried the polish on an untreated piece of obeche and got a deep, satisfying shine .. though adding further layers of this polish did not deepen the colour.